


- This event was first released as part of KDnF 15th Anniversary contents.
- In this game, you can build and upgrade your town, recruiting more adventures and send them into expedition.
- In this guide, I'll explain how this work, which building do what, and some simple strategies. Be sure to check back on this guide for any edit made in the future.
Table of Contents
Basic Concepts
- In the beginning, you start with Seria's Tree. This is basically your main command center. The higher level you upgrade, the more buildings are unlocked. Note that you will start out with only a portion of the map as buildable, you will have to upgrade Seria's Tree to uncover more building spaces.

- You will start with 4 Adventures, and you can send them to various missions so you can earn rewards and upgrade your building. The more building you have, the more adventures you can recruit.

Some Housekeeping Stuffs
- The game shuts down when you move channel: Unlike Arad Adventure, you will need to open the game up and start it every time you move channel. The good news is that the game will still run when you switch characters.
- When you remove a building, you DON'T get a refund: This is crucially important because gold is tight in the early game. Most people will just build like the picture below.

- When placing a building, only when the road is connected, guests can visit:
- There are 11 building, and this only apply to the ones that sell stuff (e.g. Bakery, Dress Room, Market). So pay attention to the description.
- You can build additional path to make sure guest can come in.

- Roads provided by default cannot be removed: The highlighted stone paths are provide by default, so use them to place your building.

Building Related Information
- Most of your building can be found in the construction tab. Higher level building will require Soul as well (I'll show you how to get them later).
Seria's Tree
- Just like when you run dungeon, your adventures inside this mini-world also consume FP while they're on exhibitions. Adventures will consume 1 FP for each monster they defeat. Consume 4 FP if they die.

- The higher level Seria's Tree is, the faster your adventures can recover FP.
- Level 1: Recovers 1 fatigue every 50 seconds (total recovery = 2 hours and 10 minutes)
- Level 5: Recover 1 fatigue every 46 seconds (total recovery = 2 hours)
- Level 10: Recovery 1 fatigue every 41 seconds (total recovery = 1 hour 47 minutes)
- Level 15: Recovery 1 fatigue every 36 seconds (total recovery = 1 hour 34 minutes)
Remedial Basilica

- When an Adventure dies, they go here. Higher level will revive them faster.
- Level 1: 90 seconds to full recovery
- Level 15: 20 seconds to full recovery

- This is a place where you craft stuffs to sell to customer that walked in for coins. The basic one is bread.

Adventurer's Guild Office
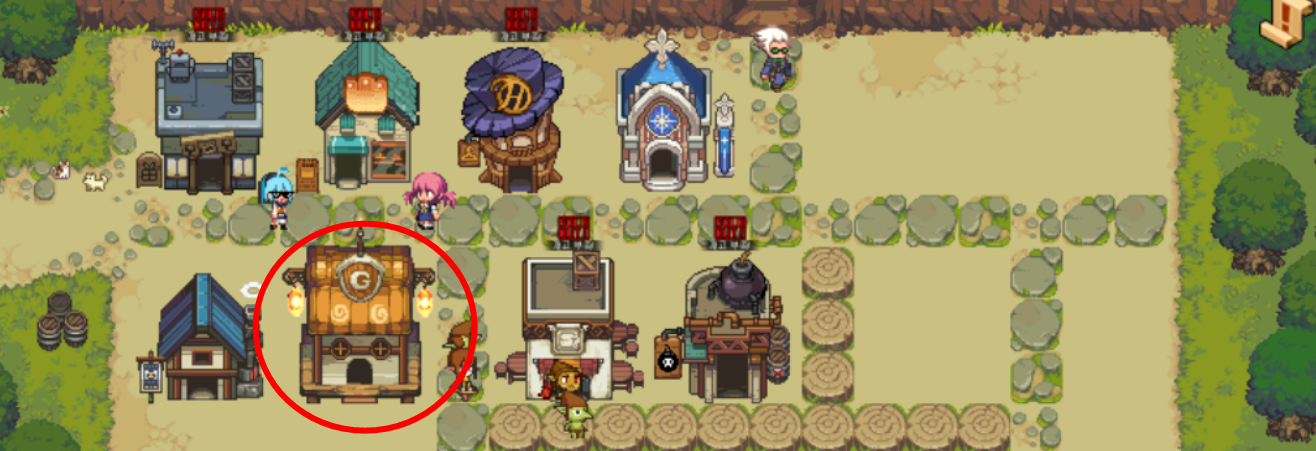
- This is the most important building for mid-late game. This is your ONLY source of SOUL.
- Think of this like a place where you send out hit-list for your adventures. You can send out up to 4 adventures to hunt down those hit-list. As you can see, the higher level these hit-list are, the more gold and higher tier souls you can get.

Linus' Forge

- This is where you can make weapon and other equipment to make your adventures stronger. Higher equipment will require higher tier souls.

Sharan's Wizard Guild

- Just like "Linus' Forge" where you get your weapon and armor, in Sharan place, you can craft your accessory.

Loton's Alchemy Shop
- You can craft potion here to help your Adventures survive longer. They will be consume automatically.

Danjin's Jar Shop
- Of course, what is a mini-game that doesn't have RNG gacha machine? Here you basically break pots for a chance of strong equipment.

Adventurer Related Information
- You start out with 4 adventures and you get more as you place more building. Each adventure will have 4 equipment slots, and you unlock them as you level up.

- Just like all the old school MMORPG, each level up you get attribute point to put them into 4 possible places: Attack, Defense, Health, and Crit. You can reset attribute as well, it would just cost a bunch of coins.
Which Attribute to Invest
- Below is the comparison between Attack (Blue), Defense (Red), and Health (Gray), compiled by the KDnF community. The x-axis is the number of point invested for each stat. The y-axis is the amount of hit needed to kill a mob or the amount of hit needed to kill the adventure. (See EDIT at the bottom for further recommendation)

- As you can see, whichever curve is the stiffest is the one you should invest in. I'll give you some examples.
- Example 1: If you invest 12 points in defense based on adventurer level 21, you need to hit 22 times to kill the adventurer, and you need 2 points to increase one.

- Example 2: At level 31 adventurer, if you invest 11 points in attack power, you need to hit 8 times to kill a mob, and 3 points are required to reduce 1. As you can see, investing on attack power is not as efficient as Defense.

- Example 3: If you invest 16 points of HP based on Adventurer level 41, you need to hit 24 times to kill the Adventurer, and you need 3 points to add 1 more. Again, still not as efficient as Defense.

- So here're the TLDR:
- Attack Power: Efficiency is high in the beginning, but decreases with investment.
- Defense: Low efficiency at the beginning, but increases with investment.
- Health: Shows a certain efficiency, but falls short compared to defense.
What about Critical?
- KDnF has a chart for that too. Here are the comparison between Attack (Blue) vs. Critical (Orange). The x-axis is the number of point invested for each stat. The y-axis is the calculated attack power. Here they assume that 1% attack is the same as 1% critical.

- As you can see, there's a huge gap between the two. Unless you can equip that much attack power from epic tier items, it doesn't worth putting point on Critical.
Tips and Tricks
- Building:
- Those building that sell items (e.g. bakery), the entrance of the building must face the path so customers can come in and buy things.
- The blacksmith & guild office doesn't sell anything, so they don't have to face the path.
- It is recommended to upgrade the building in the order of Tree → Guild Office → Blacksmith. (Higher level Tree = higher fatigue recovery speed up per hour, Higher level Guild Office = more Soul farming required for building upgrade, Higher Blacksmith = Making higher items necessary for hunting)
- Making Coin:
- In the beginning, they give you a free bakery, so you just have to send the characters to the goblin hunting grounds, farm the ingredients, and make and sell bread. (25 coins each)
- There're also Market and Dress Room as well, so use those to make coin the same way as bread. (Market 40 coins each, Dressing room 60 coins each)

- Mob Stat:
- Goblin: HP 420, Attack 80, Defense 50
- Tau: HP 2600, Attack 140, Defense 50
- Bigfoot: HP 3700, Attack 184, Defense 50
- Walker: HP 5200, Attack 238, Defense 50
- Kashipa: HP 6500, Attack 323, Defense 50
- Auca: HP 7700, Attack 373, Defense 50
EDIT 9/3/2021
- Another strategy that claimed to work well is the "Glass Canon". It basically says that end game subjugation like Isys and above have so much damage that it's better just dump all your point into Attack. As long as your adventure can do 1 hit, that's all that worth it. The reddit threads are:
- I was interested and reset 4 of my adventures who were level 83, 71, 70, and 69, who were struggling to clear Luke subjugation. It costed be about 150k coins or so and I changed them all to attack. Their gears and stat as follow. Blow in the hole, it seemed to work quite well.

- If you're a player who do all Defense like me right at the beginning, I don't think you wasted your time and coin. I thought the leveling process with Defense went well. It's only the Subjugation part that didn't pay off.
- I was finally able to defeat Sirocco in subjugation. Below is the proof and my characters stats along with my main building levels.


- What make Sirocco hard is that she does AoE damage and she heals 1,000 HP every few second. What I did to defeat her is basically keep sending adventures over and over. I swapped all my adventures from Defense to Attack.
- As you can see, after defeating Sirocco, 8 adventures were out of FP, and 8 adventures were at about half FP. So make sure you have enough adventures that are at high enough level before you face Sirocco.
References


.png)
.png)

.png)


So does that means the optimal stats for adventurer is 15 points and attk then defense all the way?
ReplyDeleteI wouldn't say that's an optimal option. If you look at the level 41 adventure graph, att falls short after about 9 points.
Delete