

- This article will only go over how the raid works, how to deal with boss mechanics, and common raid strategy. Lots of the bosses here you have met through Black Purgatory.
- For complete information about its rewards, raid shop, monster cards, etc. Please visit this Ozma Raid Information page. For all other Ozma related posts (e.g. tips & tricks, Ozma set summary), visit this Ozma category.
- Before we get started, the author thanks Pata from GBL Discord for great edit suggestions. For the submission of the Master of Ozma Raid event, screenshots of explorer club level and character name can be found in this About Me page.
Table of Contents
Rationale System
(aka Sanity Gauge)

- Think of this as your sanity level. Everyone will have their own gauge. This gauge reduces when hit with boss attacks. When it hits zero, you will lose your mind and start to threaten the other members. You can see everyone's gauges by the orange/purple indicator underneath their party name.
- When your gauge hits zero, you will be teleported to a limbo place where you have to counter attack Ozma's illusion 3 times in order to regain your conscious mind and come back to reality.

- If you fail to counter attack within the time limit in limbo, you die. If you success, you come back with your gauge turned purple and at 50%. If your purple gauge hit zero again, you die.
- It's important to come back as soon as you can because there are patterns that require all 4 members to solve.
- NOTE: With the patch from September 2021, this system is made a bit more tolerable where you don't have to counter as much.
Phase 1 Operation Black Earth: Decent of Annihilation

- Phase 1 consists of 3 crossroads: Destruction, Despair, and Terror. It also has 1 special dungeon Tower of Revelation, and 1 camp.
- NOTE: In phase 2, you can move between these dungeon using the map UI without retreating. But in phase 1, you will have to use the dungeon route to move around once you enter the crossroad.
- The goal is to clear the main dungeon, Holy Land of Fear, in Crossroad of Terror. In order to enter Crossroad of Terror, you needs to clear the other 2 Crossroads first (Destruction and Despair).
- Each Crossroad also has 4 sub-dungeons: Main, Liberation, Chaos, and Secondary.

 - Main dungeons: These will clear the crossroad
  - Liberation dungeons: You must clear this to enter the main dungeon
 - Chaos dungeons: This raises the chaos level of the raid (aka difficulty)
 - Secondary Dungeons: This provide buff effects for the raid when cleared.
- Camp is where your character stay when not entering dungeons. Think of it like a waiting area. Staying here will recover your sanity points.
- Tower of Revelation is a special dungeon that spawns negative effects (aka debuff) periodically every time it comes up. It will spawn 5 mins after the raid start.
- There's are not many footages about this dungeon. Basically if you don't clear the dungeon and let it run, it will give out revelation debuff to the whole raid.
- 1st Revelation will spawn meteors around all the maps. 2nd Revelation will increase monster's defense. If the 3rd Revelation take place, the raid will reset.
- Once cleared, the dungeon will respawn after 5 minutes. The boss is "Jade, Revelator of Chaos"

- The liberation dungeon is "Inside the Gate of Chaos", the boss is "Venta, the Reaper of Chaos". You must clear this to open up this crossroad's main dungeon.
- The main dungeon is "Tomb of Rest", the boss is "Verias of Doom". Clear this dungeon to finish Crossroad of Destruction.
- The buff dungeon is "Corridor of the Dead", the boss is "Scarpel". Clear this dungeon will increase everyone's damage by 20% for 5 minutes. The dungeon respawn time is 2 minutes.
- The chaos dungeon is "Gladdon, Plains of Doom", the boss is "Chasing Draug & Playful Frigg". Clear this dungeon to increase the raid's chaos level.
Crossroad of Despair
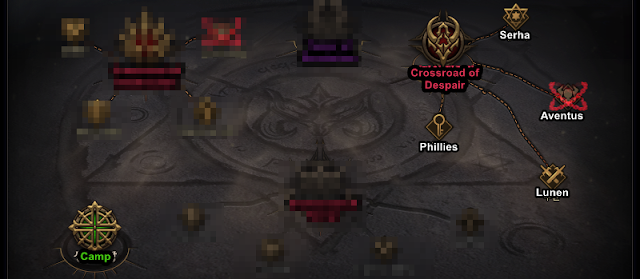
- The liberation dungeon is "Phillies, Path of Despair", the boss is "Despero, the follower of Chaos". You must clear this to open up this crossroad's main dungeon.
- The main dungeon is "Aventus, the Cradle of Despair", the boss is "Tiamat of Despair". Clear this dungeon to finish Crossroad of Despair. Finish both crossroad of Destruction and Despair will grand you access to Crossroad of Terror.
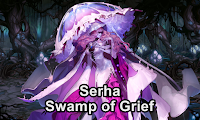
- The buff dungeon is "Serha, the Swamp of Grief", the boss is "Infiltrator Trocar". Clearing will increase everyone's maximum sanity points only one time, and a buff that will increase your sanity recovery speed while at camp.
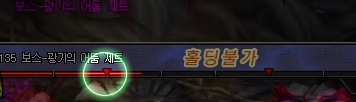
- The chaos dungeon is "Lunen, the Silent Forest", the boss is "Drooping Darkness Jet". Clear this dungeon to increase the raid's chaos level.
Crossroad of Terror

- After clearing the 2 main dungeons in Crossroad of Destruction and Despair, this Crossroad of Terror will open.
- The liberation dungeon is "Eltfel, the Valley of Eternal Flame", the boss is "K, Encroached by Chaos". You must clear this to open up this crossroad's main dungeon.
- The main dungeon is "Grauben, The Holy Land of Fear", the boss is "Kazan, God of Extinction". Clearing this dungeon will complete phase 1.
- The buff dungeon is "Altar of Red Paradise", the boss is "Lieutenant Leonid". Unlike other buff dungeon, you MUST clear this. Otherwise, Kazan's health in the main dungeon will NOT drop below 10%. Clearing the dungeon will active Kazan's groggy.
- The chaos dungeon is "Martyr's Chapel", the boss is "General Karelin". Clear this dungeon to increase the raid's chaos level.
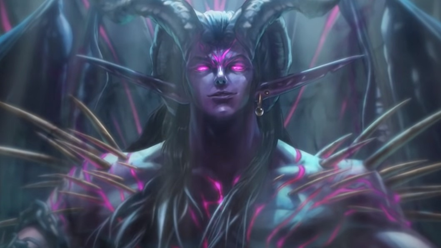
Phase 2 Operation Ellerinon: Second Coming of Chaos

- We all know in Sirocco raid, if you retreat during the fight without activating Roxy, the damage dealt will reset. But not in Ozma raid, the damage will continue to accumulate when treating.
- Throne of Chaos, the goal is to clear this dungeon to complete the raid. It consists of 3 dungeons. The bosses in there share the same HP value, and the damage inflicted is shared. (just like Sirocco raid where you fight 3 forms). If no party is facing Ozma, he heals 1% every couple seconds.
- Special Dungeon: City of Tragedy. Once cleared, you can force Ozma to enter a special state. You can only enter this dungeon once you have completed certain conditions. The boss is "Astaros of Black Terror"
- Secondary Dungeon: Garden of Mirrors. Once cleared, it will increase recovery speeds for the people at camp, and also gives damage buffs for everyone. Someone must be fighting Ozma in Throne of Chaos for other party to enter this dungeon. The boss is "Vanya Covets Chaos"
- NOTE: You can move between these dungeon using the map UI without retreating.
- After entering the Throne of Chaos, "Armis, Garden of Mirrors" dungeon will open after a while. It provides a buff that increases the damage of all raid members by 20% for 5 minutes. As time passes, the buff turns off and the dungeon respawns, so periodic clearing is required.
- When Ozma's HP is below 70%, "Ellerinon, City of Tragedy" opens. If not cleared, Ozma's health does not fall below 50%, so it is a dungeon that MUST be cleared.
- Clearing Ellerinon will also activate Ozma's phase 2, aka he get up from his chair and actually fight you.
- Ozma's health also have some red ▼ mark. This is a special pattern warning. When HP drops to the marked point, a special pattern is executed.
- Ozma does have several 10-sec groggy patterns, but I'll explain how to activate it in another section.
Dungeon Mechanics

Crossroad of Destruction


Crossroad of Despair


Crossroad of Terror


Phase 2


Strategy Example
- I know the top of the picture says Red Orange and Yellow parties. But for this example, I'll call Yellow as Green so it's easier to see on the map.

- For Crossroad of Destruction and Despair:
- Green will clear both buff dungeons to provide +20% damage boost and sanity health for the whole raid.
- While Green doing those, Red and Orange will clear both Keys and Main dungeons. (During this time, Tower of Revelation probably already activated, if your raid is not strong enough, this is a good time for Green to clear this).
- For Crossroad of Terror:
- By the time you clear the two crossroads, the +20% buff dungeon probably already reset. While Green party clearing Key to open up the main dungeon, Red can clear the buff dungeon one more time.
- When key is done, Red can do Main dungeon while Orange do Lieutenant Leonid to activate Kazan's groggy. During this time, Green can clear other buff dungeons if needed.
- For Phase 2: Everyone go in and nuke. Green then clear Mirror for damage buff. When Ellerinon open, Orange clear to activate Ozma phase 2. Everyone come back in to do damage and Green clear Mirror periodically if needed.
Raid Strategy - Gamechosun
Raid Strategy - Naver
Main & Key Dungeon Mechanics - Gamechosun
Buff Dungeon Mechanics - Gamechosun
Chaos Dungeon Mechanics - Gamechosun
Phase 2 Dungeon Mechanics - Gamechosun
YouTube - 히카리타마
YouTube - JangJiTube
YouTube - 오형짱
.png)
.png)
.png)

.png)
.png)

.png)


Amazing info, great job and thanks!
ReplyDelete